ASP.NET MVC 5 With Entity Framework And MySQL — Code First Migrations
So last week one of my colleges came to me and asked for how to use code first migrations with mysql databases. I haven’t really worked with mysql together with .net so I said I will look into it and answer later. So, on my quest to figure out how to do it, this is what I found.
First, let’s go ahead and create a ASP.NET MVC 5 Wep Application on Visual Studio. I’m sure all of you know how to do it, but just in case I’m gonna explain it anyway. (I’m using Visual Studio 2017)
Go to File — > New — > Project.


Select ASP.NET Web Application (.NET Framework). I will name it as MySQLCodeFirst, you may use your desired name. And note that I’m on .NET Framework 4.6.1

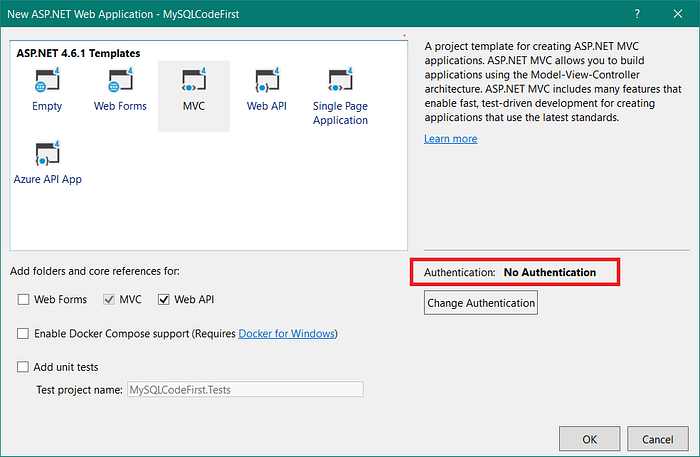
In the next prompt select MVC from the list of templates, and if you want to make the Identity framework to take care about user accounts go ahead and add it too by clicking on “Change Authentication” button and selecting “Individual User Accounts”

Once you are done, click OK and let the VS to create the solution.
Now we need a nuget package for MySQL called MySql.Data.Entity.EF6 but before that you need to have MySQL connector for .NET to be installed on your computer. You can download it from this web site. https://dev.mysql.com/downloads/connector/net/8.0.html
Now right click on the project from Solution Explorer, go to Manage Nuget Packages. Search for “mysql.data.entity”.

Install MySql.Data.Entity package by oracle. Once it is done it should appear in the providers under entity framework in Web.config file.
<entityFramework><defaultConnectionFactory type="System.Data.Entity.Infrastructure.LocalDbConnectionFactory, EntityFramework"><parameters><parameter value="mssqllocaldb" /></parameters></defaultConnectionFactory><providers><provider invariantName="System.Data.SqlClient" type="System.Data.Entity.SqlServer.SqlProviderServices, EntityFramework.SqlServer" /><provider invariantName="MySql.Data.MySqlClient" type="MySql.Data.MySqlClient.MySqlProviderServices, MySql.Data.Entity.EF6, Version=6.10.8.0, Culture=neutral, PublicKeyToken=c5687fc88969c44d"></provider></providers></entityFramework>
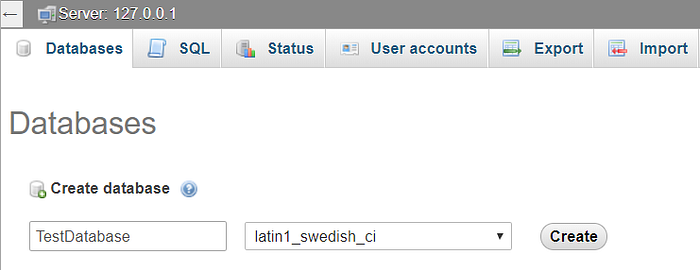
Open up phpMyAdmin and setup a new empty database.
After that add the connection string to the Web.config. It should be added to the <configuration><configuration/> tag. Make sure that the <connectionStrings> element is the second element(child) under <configuration>. First child should be <configSections> which will be there by default.
<configuration>
     <configSections>          <!-- For more information on Entity Framework configuration, visit http://go.microsoft.com/fwlink/?LinkID=237468 -->          <section name="entityFramework" type="System.Data.Entity.Internal.ConfigFile.EntityFrameworkSection, EntityFramework, Version=6.0.0.0, Culture=neutral, PublicKeyToken=b77a5c561934e089" requirePermission="false" />    </configSections>    <connectionStrings>         <add name="DefaultConnection" providerName="MySql.Data.MySqlClient" connectionString="server=localhost;port=3306;userid=root;password=;database=testdatabase;persistsecurityinfo=True" />    </connectionStrings>
    .
    .
    .
    .
</configuration>
My full Web.config file can be found here.
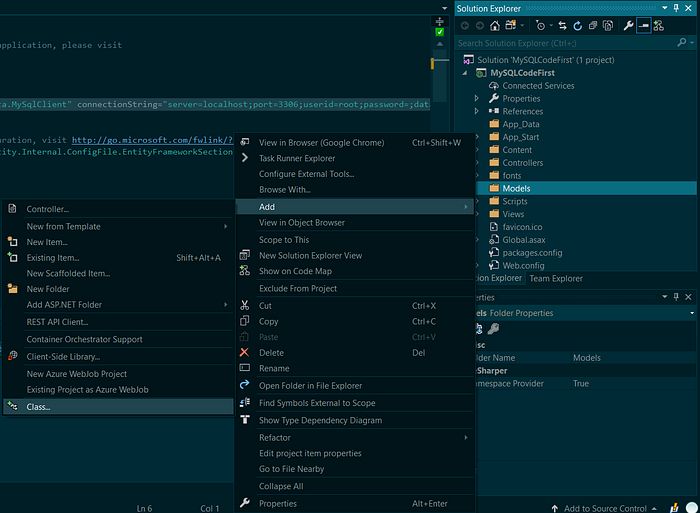
Now you need to have your model classes to migrate them to the database. So, let’s go ahead and create one model class. Right click on Models -> Add -> Class
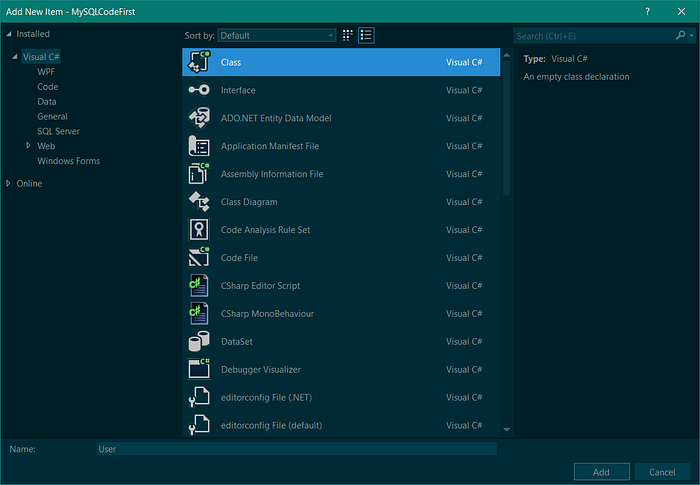
I have added a class named User. Then I will add following properties to user. You may do as you desire.
using System;using System.Collections.Generic;using System.Linq;using System.Web;namespace MySQLCodeFirst.Models{ public class User { public int Id { get; set; } public string FirstName { get; set; } public string LastName { get; set; } }}
Now we need to create our Database Context class. Again right click on Models -> Add -> Class. I will name my Database Context class as DataContext. It should be a child class of DbContext super class. To refer DbContext you need to have System.Data.Entity namespace.
using System;using System.Collections.Generic;using System.Data.Entity;using System.Linq;using System.Web;namespace MySQLCodeFirst.Models{ public class DataContext : DbContext { }}
Copy following constructor to the DataContext class.
public DataContext() : base("DefaultConnection") //This 'DefaultConnection' should be equal to the connection string name on Web.config.{ this.Configuration.ValidateOnSaveEnabled = false;}
You need to add DbConfigurationType decorator to the class, and to do that, you need to add MySql.Data.Entity namespace.
using MySql.Data.Entity;namespace MySQLCodeFirst.Models{    [DbConfigurationType(typeof(MySqlEFConfiguration))]
    public class DataContext : DbContext    {
    .
    .
    .
    .
    }
And inside the DataContext class, add a DbSet property to include your model class. Every other model class you create afterwards should have a DbSet property in DataContext Class.
public DbSet<User> Users { get; set; }If you went with No Authentication when selecting the template, as in here,
your full DataContext class should look like this.
If you changed the Authentication to Individual User Accounts, then your DbContext will be ApplicationDbContext and it should reside in IdentityModels.cs file. Add [DbConfigurationType(typeof(MySqlEFConfiguration))] to ApplicationDbContext and OnModelCreating method as follows.
I have added an extra method OnModelCreating and some rules inside to make MySql complaint with entity framework rules. Here we are converting nvarchar(MSSQL Server) to varchar(MySql). If you did not do this, you might see an exception while creating the migration as,
Specified key was too long; max key length is 767 bytes
See this stackoverflow question for more details.
Now go to Tools -> NuGet Package Manager -> Package Manager Console. This will open up a console window. Type,
enable-migrationsYou will notice there is a new folder named Migrations in the project.
Now execute the command,
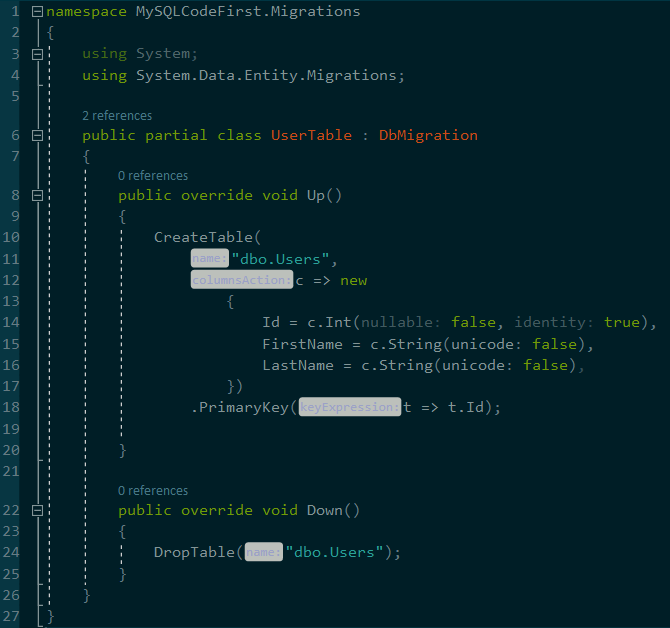
add-migration UserTableHere, you can specify the name of the migration after <space>. I have named it as “UserTable”. If you did everything correctly, new migration should open up.
Now you can run the command,
update-databaseto persist the changes to the database. After that is done, go to the database and check if everything is there, including the __migrationhistory table.

Done!, now go ahead and create your model classes, relationships and run migrations.
Happy coding! :)